How Do I Waterproof a Shower Floor Before Tiling?
Key takeaway
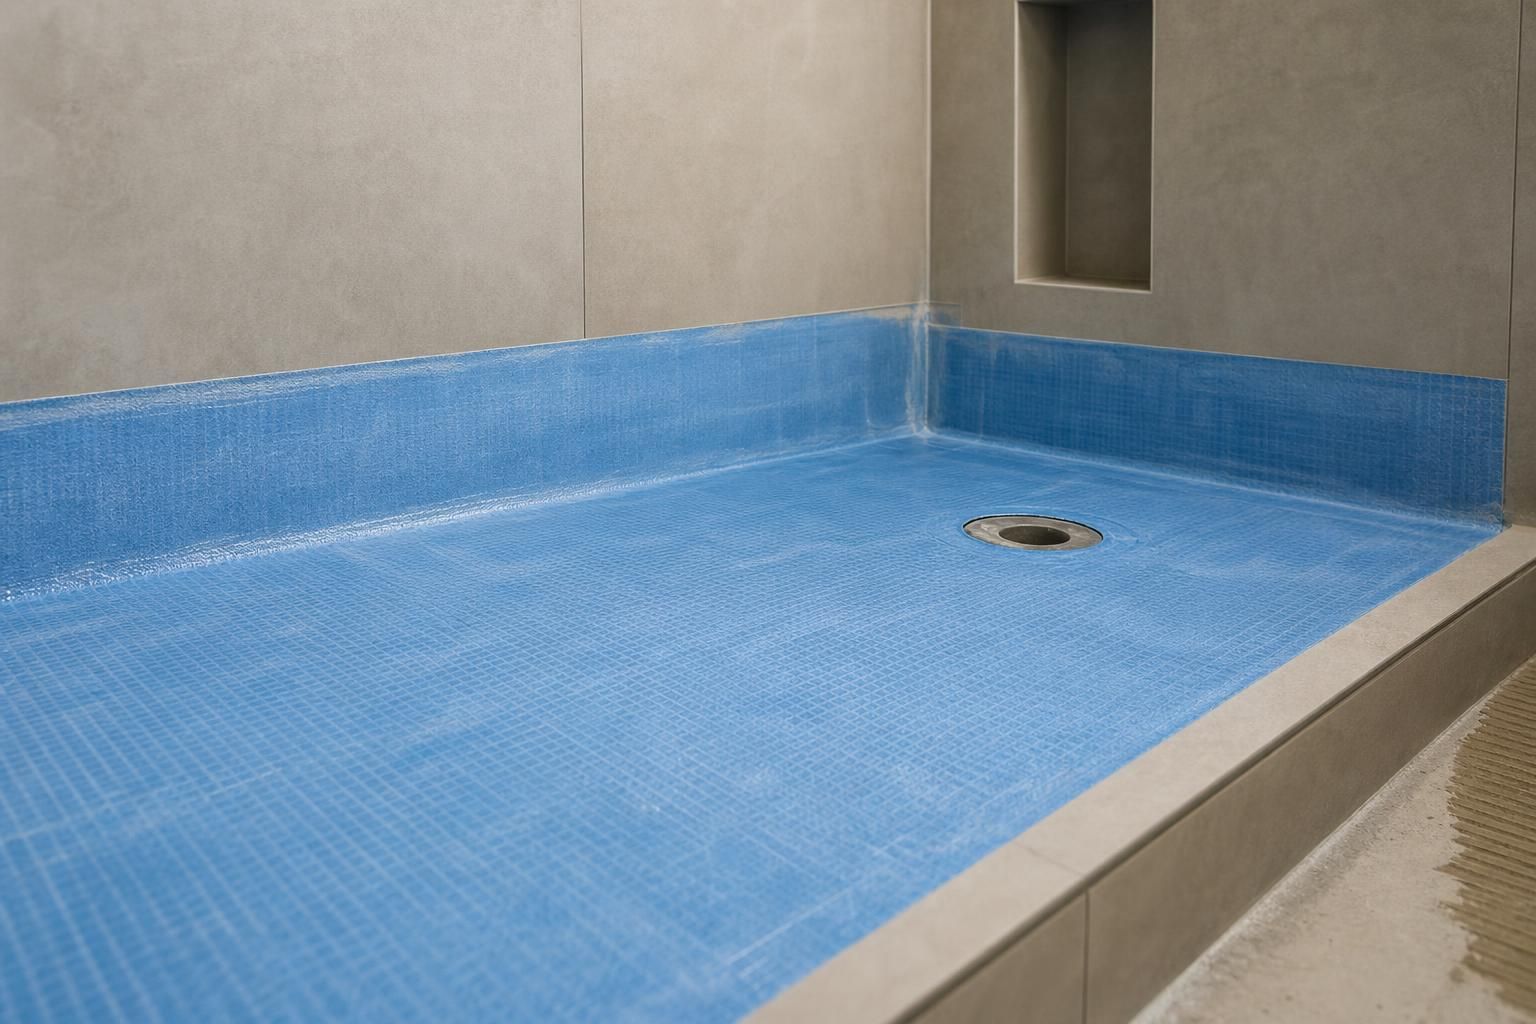
You waterproof a shower floor before tiling by building a sloped mortar bed for drainage, then covering it with a waterproofing membrane — either a sheet membrane bonded with thinset or a liquid/topical membrane rolled or troweled on — that ties into the drain flange and runs up the walls at least a few inches. The membrane, not the tile or grout, is what actually stops water; tile is decorative and porous grout will always let some moisture through. Skip or shortcut the membrane step and the leak usually shows up in the ceiling or wall below, not in the shower itself.
Key takeaways
- The waterproofing membrane goes under the tile, on top of a properly sloped mortar bed — tile and grout alone are not a waterproofing system.
- Two accepted methods exist: sheet membranes (bonded with thinset) and liquid/topical membranes (rolled, brushed, or troweled) — both need to meet ANSI A118.10 performance standards.
- Every seam, corner, curb, and drain penetration is a potential leak point and needs its own strip of membrane or preformed corner/curb piece, not just a coat over the flat field.
Why the Membrane Matters More Than the Tile
Ceramic and porcelain tile are not waterproof by themselves. Grout lines are porous, and even sealed grout will absorb some water over years of daily showers. The Tile Council of North America publishes installation handbook details that assume a separate waterproofing or moisture-management layer behind or under the tile in any wet-area assembly — the tile is the finish surface, the membrane is the water barrier. In Hawaii's humidity, a shower assembly that traps moisture behind tile instead of shedding it can also feed mold growth inside wall and floor cavities, which the CDC's guidance on mold and moisture control notes is largely a function of trapped moisture rather than tile choice.
The Two Standard Waterproofing Methods
Both methods below are recognized under ANSI A118.10, the industry standard referenced by most manufacturers and building departments for load-bearing, bonded waterproofing membranes in tile assemblies.
- Sheet membrane: A flexible or semi-rigid sheet (often polyethylene-based) is bonded to the mortar bed and walls with thinset, with edges lapped and sealed at seams. Preformed corners and drain collars snap or bond into the field membrane, which reduces reliance on hand-cut seams at the hardest points to seal.
- Liquid/topical membrane: A liquid rubber or polymer coating is rolled, brushed, or troweled directly onto the mortar bed and walls in multiple coats, reinforced with fabric mesh tape at corners, seams, and the curb. It cures into a seamless membrane and conforms easily to irregular shapes like curved benches or niches.
Neither method is inherently better in every case — sheet membranes are faster to inspect visually (you can see coverage gaps), while liquid membranes handle odd geometry and retrofits over existing mortar beds more easily.
Step-by-Step: What Happens Before the Tile Goes Down
- Frame and set the drain. The shower pan drain is set at the correct height for the finished floor, with the flange left exposed for the membrane to bond to.
- Pour a sloped mortar bed. Deck mud is packed and screeded to slope roughly a quarter inch per foot toward the drain — this slope is what actually moves water out, not the tile surface.
- Pre-slope check. Many installers pour a rough pre-slope, let it cure, then apply the membrane, then a second topping slope on top of the membrane — this way the membrane itself is also sloped and can drain any water that gets behind the tile down to a weep hole in the drain.
- Apply the membrane. Sheet or liquid membrane goes over the entire pan, up the walls a minimum of a few inches above the finished shower head or shelf height, and fully around the curb.
- Reinforce seams and corners. Fabric tape or preformed pieces cover every inside corner, outside corner, curb top, and the drain flange transition — these are the points that fail first if skipped.
- Flood test. Before tile ever goes down, the drain is plugged and the pan is filled with water for a set period (commonly 24 hours) to confirm there's no active leak.
- Tile over the cured, tested membrane.
Only after that flood test passes does tile installation begin.
Common Mistakes That Cause Leaks Later
- Skipping the flood test. A membrane that looks fine dry can still have a pinhole at a seam or drain collar that only shows under standing water.
- Not extending the membrane high enough up the walls. Splashing and shower spray reach higher than most people assume; manufacturers' membrane instructions specify minimum heights for a reason.
- Treating the curb as an afterthought. The shower curb top and both sides need full membrane coverage and corner reinforcement — it's one of the most common leak points in older Hawaii bathroom remodels.
- Using thinset or grout as the only water barrier. Grout sealers slow absorption; they don't waterproof. The membrane underneath is the actual barrier.
Who Should Handle This Part of the Job
Waterproofing a shower pan correctly is a sequencing and inspection problem as much as a materials one — the pre-slope, membrane, flood test, and topping slope have to happen in the right order with the right cure times in between, and a rushed schedule is where corners get cut. This is one of the reasons bathroom and wet-area waterproofing is typically bundled into a full remodel scope handled by a remodeling contractor rather than treated as a standalone tile job — the crew doing the tile also needs to sign off on the pan underneath it.
If the rest of the bathroom floor outside the shower itself is being redone at the same time, that's a separate material decision: SPC flooring is fully waterproof and works well on the dry-side bathroom floor, but the shower pan itself still needs a sloped, membraned tile assembly built to drain — SPC planks are not a substitute for a tiled, sloped shower floor. Homeowners budgeting for both scopes together often find it useful to understand how contractor pricing is structured before getting quotes, since flooring and wet-area tile work are usually priced and scheduled separately even within the same remodel.
Frequently Asked Questions
Q: Do I need a membrane if I'm only re-tiling, not rebuilding the whole shower pan?
If the existing mortar bed and slope are sound and undamaged, a topical liquid membrane can sometimes be applied directly over the old bed before re-tiling. If the substrate is cracked, soft, or has a history of leaks, the pan needs to be rebuilt from the drain up.
Q: How long does a flood test need to run?
Most installers plug the drain and hold standing water in the pan for 24 hours, checking the ceiling or space below for any sign of moisture before proceeding to tile.
Q: Can I use regular tile grout as my waterproofing layer?
No. Grout and grout sealers slow water absorption but are not a waterproofing system; the membrane under the tile and mortar bed is what actually blocks water from reaching the subfloor or framing.
Q: What's the difference between sheet and liquid membranes for a shower pan?
Sheet membrane is a bonded, factory-made material with preformed corner and drain pieces, while liquid membrane is a rolled or troweled coating reinforced with fabric tape at seams — both meet the same ANSI A118.10 performance standard when installed correctly.
Q: How high up the shower walls does the membrane need to go?
Membrane manufacturers typically specify a minimum height above the shower head or highest fixed shower point, often several inches beyond it, since spray reaches higher on the walls than most people expect.