How Do I Transition Vinyl Plank Flooring Between Rooms?
Key takeaway
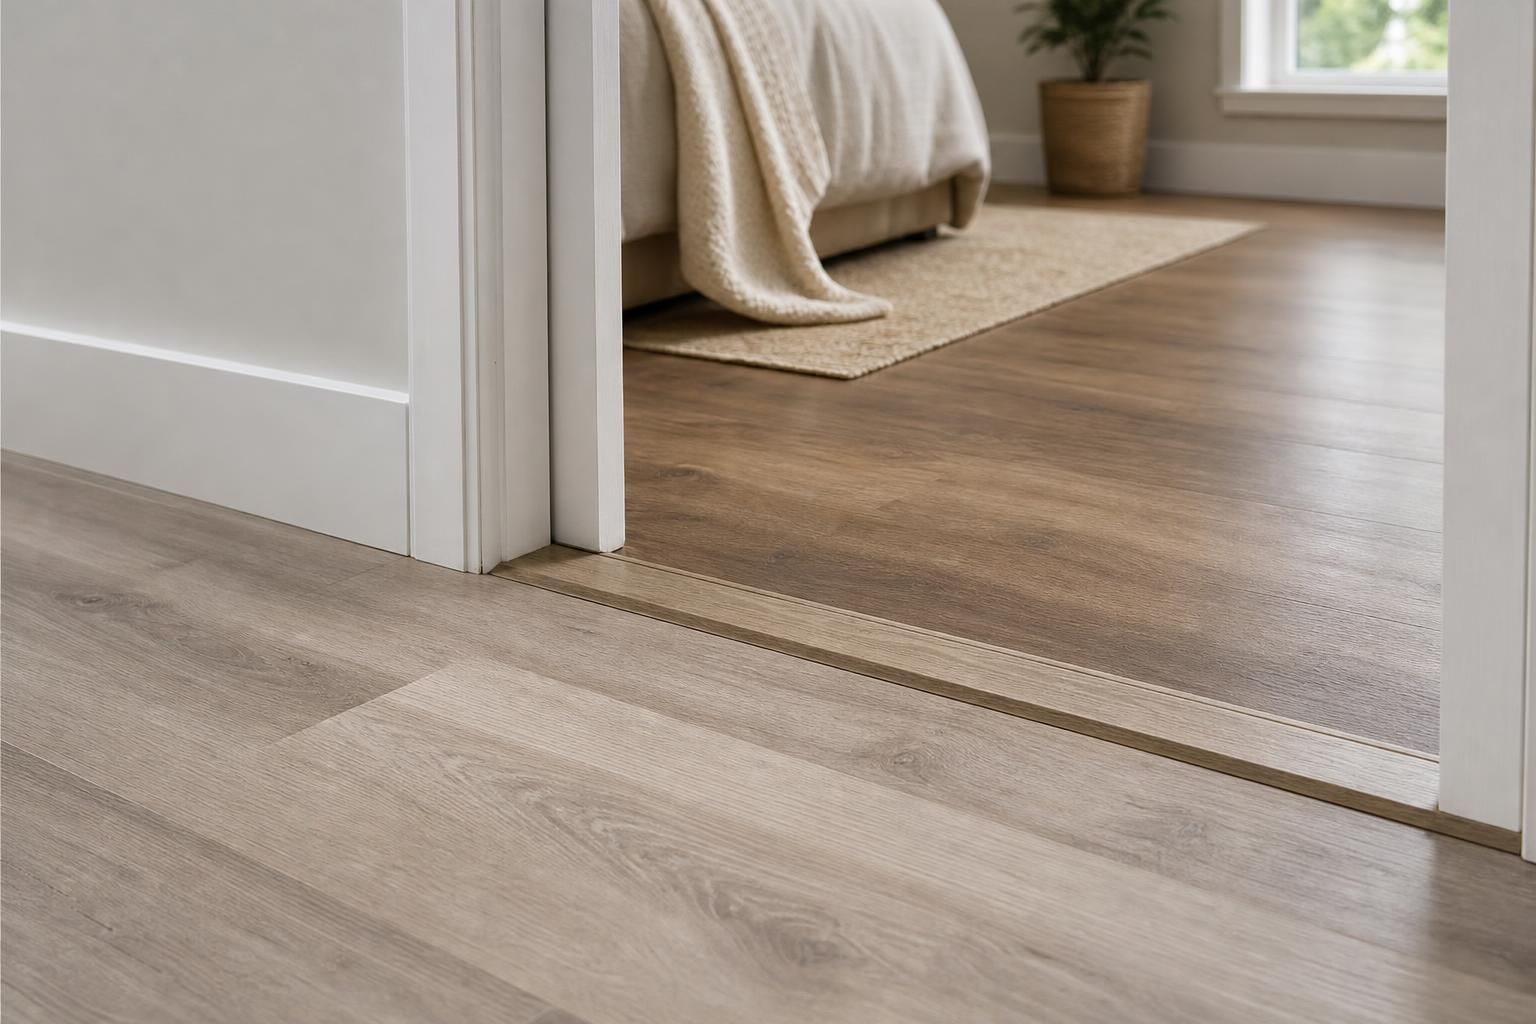
You transition vinyl plank flooring between rooms by leaving an expansion gap at the doorway, bridging it with a transition molding (T-molding, reducer, or a flush threshold), and anchoring that molding to the subfloor rather than to the plank itself. The method you choose depends on whether the two rooms have the same flooring at the same height, different materials, or a wet area like a bathroom where waterproofing matters more than aesthetics.
Key takeaways
- Leave a 1/4-inch expansion gap at every doorway and wall edge, then cover it with a transition piece screwed or glued to the subfloor, never nailed through the plank.
- Use a T-molding for same-height floors, a reducer for a step down to a lower material, and a threshold at wet-area doorways like bathrooms.
- Keep plank direction running the same way through a sightline (hallway into living room) and it's fine to shift direction behind a closed door.
Why vinyl plank needs a transition at all
Luxury vinyl plank, including rigid SPC core, expands and contracts slightly with temperature and humidity. A continuous floor with no break anywhere can buckle at a wall or doorway because the planks have nowhere to move. Manufacturers typically call for a perimeter gap of about 1/4 inch and recommend breaking long runs at doorways rather than carrying one unbroken field through an entire condo. The Resilient Floor Covering Institute publishes general installation guidance for resilient flooring that covers this expansion allowance, and it's worth checking the specific installation sheet that comes with whatever plank you buy, since gap recommendations vary slightly by product.
The three main transition types
T-molding is the right choice when both rooms have vinyl plank at the same finished height. It sits in a track screwed into the subfloor, with each side of the T tucking under the plank edge on either side of the gap. This is the most common doorway transition in a single-level condo or house doing an all-vinyl plank remodel.
Reducer strips handle a height difference, most often where vinyl plank meets a lower surface like thin tile, concrete, or an older sheet vinyl floor that wasn't torn out. The reducer tapers down from the plank thickness to the adjoining floor so there's no trip edge.
Thresholds go at wet-area doorways, such as a bathroom or laundry room, especially when the adjoining floor is tile. A threshold (often a solid-surface or vinyl threshold strip) creates a visual and physical break between a waterproofed wet area and the dry-side plank, which matters if that bathroom floor was tiled and sloped to a drain.
Doorway height and building code basics
If a unit has any ADA-related compliance requirement, such as a rental common area, doorway thresholds are capped at 1/2 inch above the floor surface. The ADA.gov accessibility guidelines set that maximum specifically so a wheelchair or walker doesn't catch on the lip. Most residential vinyl plank transitions sit well under that, but it's a useful ceiling to know if a contractor is pricing out a rental or multi-family job where accessibility code applies.
Same room, different direction: when it's okay to shift plank orientation
Plank direction should run the same way along a sightline — down a hallway, through an open living/dining area, or anywhere you can see both rooms at once from a single vantage point. Behind a closed door, in a room that doesn't share a continuous sightline with the adjoining space, it's acceptable to run planks a different direction, for example running a bedroom perpendicular to the hallway outside it. The doorway transition molding hides the direction change either way.
Wet-area and condo-specific considerations
Oahu condos often mix plank in living spaces with tile in bathrooms and kitchens, which means every unit has at least one wet-area transition to plan for. If the bathroom floor is tiled with a proper waterproof membrane underneath, the vinyl plank doorway transition just needs to sit slightly proud of the tile height and seal the gap — it isn't doing the waterproofing work itself. For a deeper look at which plank specs hold up best in condo bathrooms and high-moisture hallways, see this condo flooring guide for contractors.
Removing the old transition before you start
Most remodel jobs aren't starting from bare subfloor — there's an existing transition strip, old carpet tack strip, or a raised tile threshold to pull out first. That demo step matters because leftover adhesive or a tack strip under the new transition track will telegraph through and cause the new molding to sit unevenly. H&W Flooring includes demo in its installation rate, which is worth asking any installer about up front so it isn't a surprise add-on mid-job. If you're doing this step yourself, this guide on removing old flooring before laying vinyl plank walks through getting a doorway transition area back to clean subfloor.
Figuring out how much transition molding you'll need
Transition pieces are sold by the linear foot, typically in 94-inch lengths, and you generally need one per doorway opening plus any spot where flooring material or height changes. It's a small enough quantity that it rarely affects the bigger picture of how many boxes of plank a job needs — if you're still working out total material, this breakdown of square footage per box is the better starting point for ordering the plank itself, with transition strips added as a short separate line.
Installation cost and labor for transitions
Transition moldings are a small part of labor time compared to the plank field itself, but they do require accurate measuring and a level subfloor track so the strip doesn't rock underfoot. H&W Flooring's installation pricing is from $8 per square foot, including demo of old flooring, leveling (incl. self-leveling material), and baseboard, for the overall job, with transition and trim work handled by the same in-house crew rather than a separate sub, which matters for a consistent finish between rooms of different materials.
Frequently Asked Questions
Q: What is the standard gap to leave when transitioning vinyl plank between rooms?
Leave about a 1/4-inch expansion gap at the doorway and perimeter, then cover it with a transition molding anchored to the subfloor rather than the plank itself.
Q: Can I use the same transition strip between vinyl plank and tile?
Not usually — tile and plank are typically different heights, so you need a reducer or threshold strip rather than a flat T-molding made for two equal-height floors.
Q: Does vinyl plank direction need to match from room to room?
Only along a continuous sightline, such as a hallway into an open living area; behind a closed door, a different plank direction is fine and the doorway transition hides the change.
Q: Do I need a transition strip at every single doorway?
Yes, in general — manufacturers recommend breaking the floor at doorways so the plank has room to expand, even if both rooms have identical flooring at the same height.
Q: Who installs the transition molding if a contractor does the flooring job?
It's typically done by the same crew installing the plank field, measured and cut to fit the specific doorway width, and screwed into the subfloor track rather than glued directly to the planks.